Enhanced Observability With Cloudwatch Insights and Lambda Advanced Logging
Designing a distributed architecture can get complicated. One of the pain points is to address the data flow between multiple systems.
Luckily, cloud providers like AWS have plenty of services that aid in solving this issue. We could use services like Amazon SNS, Amazon SQS, AWS Step Functions, Amazon EventBridge, AWS Lambda, and triggers from services like Amazon S3, Amazon DynamoDB, etc. Having many choices leads to confusion in the selection of services for the application.

“AS YOU ADEQUATELY PUT, THE PROBLEM IS CHOICE”. (The Architect, Matrix Reloaded)
This three-part blog series will focus on Amazon SQS, Amazon SNS, and AWS Step Functions. In this blog, we will be discussing Amazon SQS.
What is SQS?
Amazon Simple Queuing Service, a.k.a Amazon SQS, is a message queuing service that helps us (Developers) store, send and receive a message from one component to another without any loss of transmission. It is the first infrastructure service for public usage from AWS.
SQS helps us decouple the components and build distributed applications without dealing with the complexity of creating and maintaining the message queues. SQS asynchronously processes the messages. If one party requests a particular message and those messages will be in a queue once it gets ready, the following part processes them in a ready state.
Two Types of Queuing by SQS
SQS supports two types of queuing methods. Standard Queue and FIFO (First In, First Out) Queue.
The standard queue is a default queuing method used by SQS. With this method, SQS makes sure that the message is delivered at least once. It tries to preserve that messages from queues will be processed in the same order as received.
For instance, you are ordering food in the restaurant, and the waiter brings you food at least one as in order and the rest of them based on the availability of food’s preparation status.
FIFO queue method ensures that messages are delivered exactly once and maintains the order of sent and received messages. It avoids duplication of messages when processed.
For instance, when you are in the bank, you get your token from the machine and wait for your token number to be called from one of the counters. Once the banker has called your number, you will get your service done by the banker. Like this scenario, consider you as a process that wants to send a message that checks your loan balance, your token number will be your message-id, once your message queue is ready, i.e., your token number has been called by the banker. You will get your service processed by the banker, i.e., a message will be processed to the destination.
What happens if the destination endpoint doesn’t receive its data (message)? and How SQS solve this issue?
SQS can help you deal with the problem by placing or storing the failed to processed message in a queue called “Dead-Letter Queue.” Dead Letter Queue helps the SQS to debug failed messages by isolating the issue. SQS has this redrive policy that specifies the source queue, the dead-letter queue, and the conditions of how messages should be sent or received. If the source queue’s consumer fails to read the message and it retries exceeds a maximum received count for a queue, then SQS moves the message into the dead letter queue.
The main point of using Dead Letter Queue in SQS is for handling the message failure with ease!
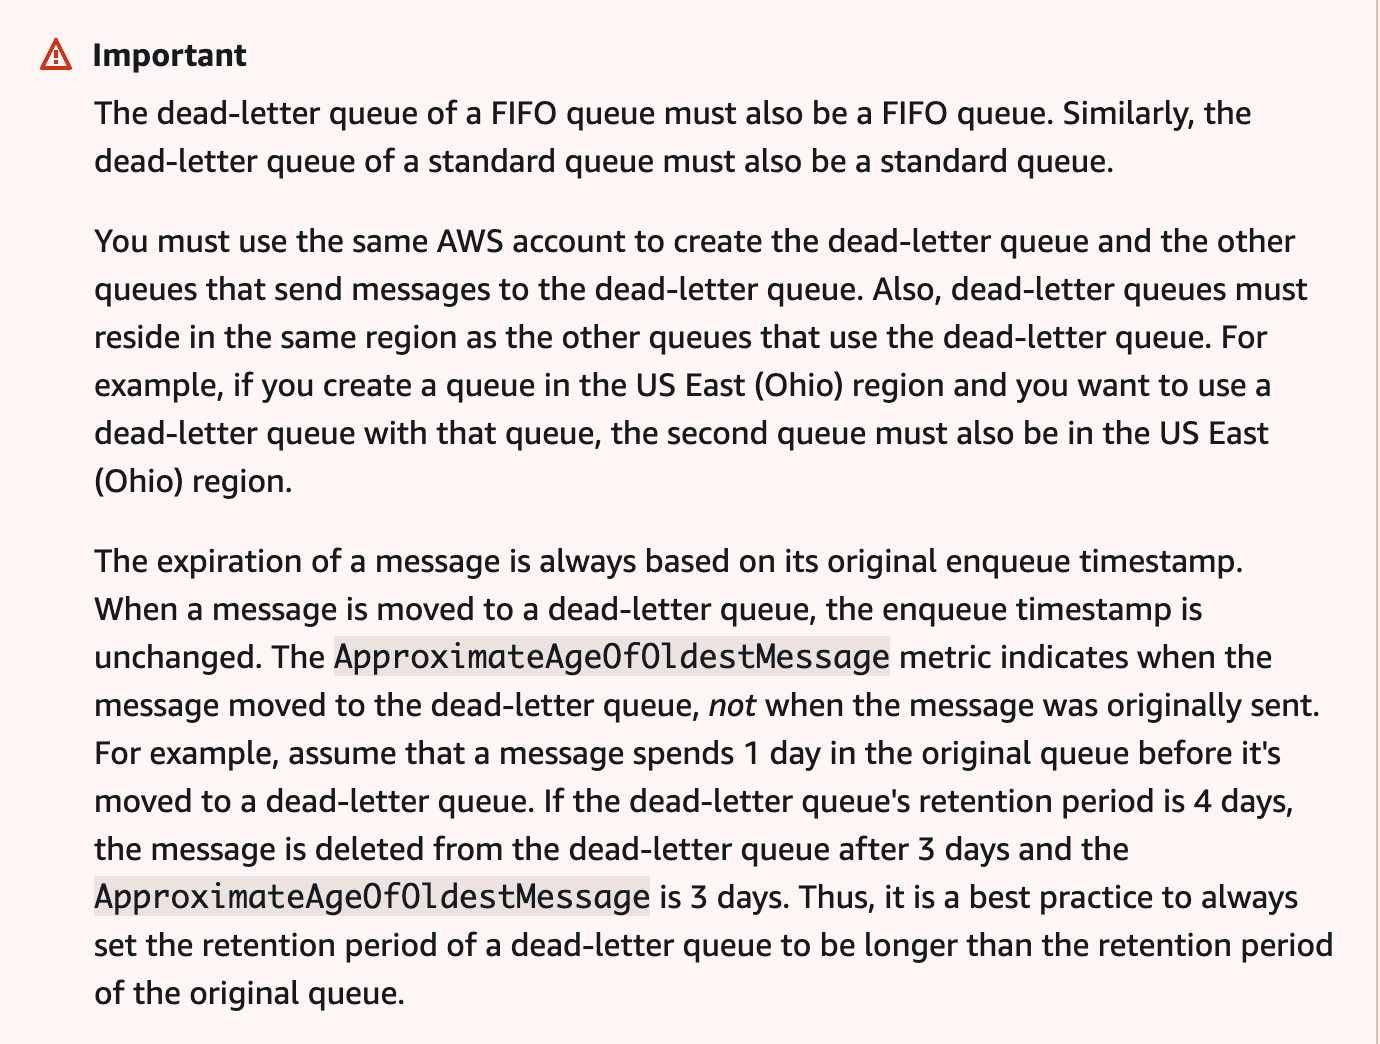
Ref: Amazon SQS dead-letter queues
What is visibility timeout? How it helps SQS to solve its problems?
Visibility Timeout is a specified period that can be used to determine the visibility of a message in a queue that should be processed.
In SQS, visibility timeout is set to prevent other consumers from receiving and processing the queue message.
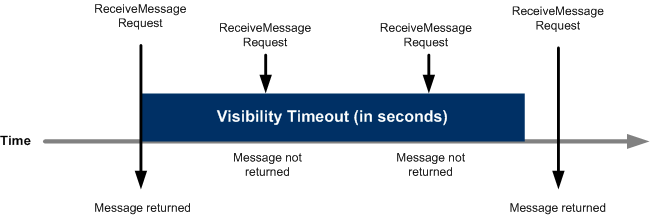
Once the consumer of the source queue receives the message from the queue, the visibility timeout will start. By default, the visibility timeout is set to 30 seconds for SQS to process the message and delete it after it finishes its duty. This process is to avoid other consumers seeing the same message again in the queue.
We can change these time settings. The minimum time is 0 seconds, and the maximum time is 12 hours.
When to Use SQS ?
Let us consider a scenario, You created an E-Commerce site that sells Electrical items to their customers online. You can give an update about the product delivery status over an email apart from your website. Every product from your website might have unique ids which help you to track all over the process.
For this process, you can use Amazon Simple Queuing Service. Using the service, you can communicate to your distributed services that maintain procedures like shipment, order packing, etc, which are all in sequential order in an e-commerce transaction. SQS gives you freedom over communication between different services which are connected in a distributed manner.
Let’s create SQS Queue using AWS Console
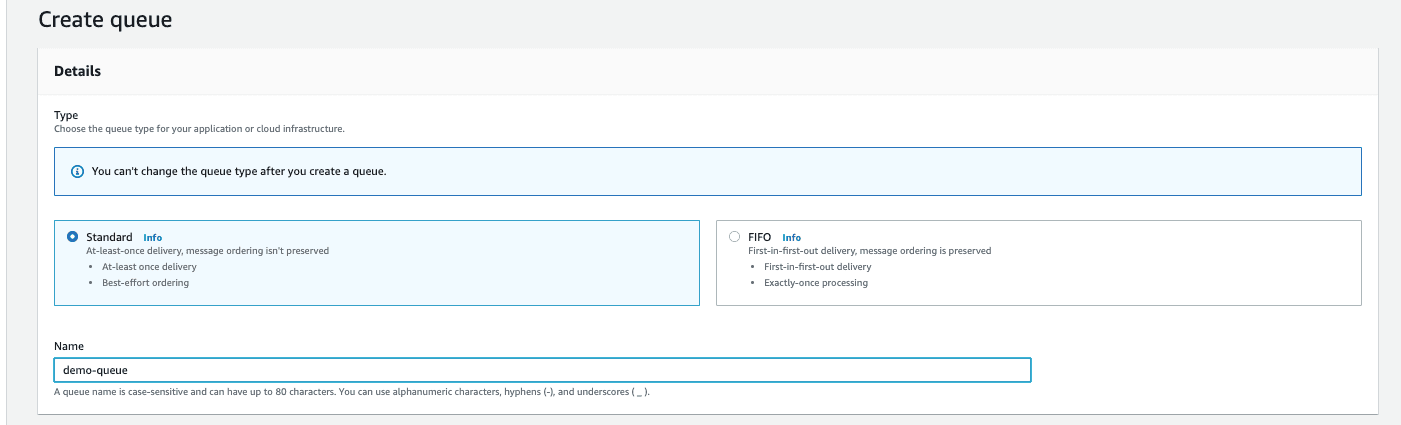
Step 1
Head to Simple Queue Service and click on “Create queue” and select “Standard” queue option for SQS Standard queue enter your queue’s name.
Step 2
Under the Configuration section, You can set the visibility timeout, Message retention period, Delivery delay, Maximum message size, and Receive message wait time for your SQS queue. In my case, we want to keep my visibility timeout as 60 seconds and keep other options as default.

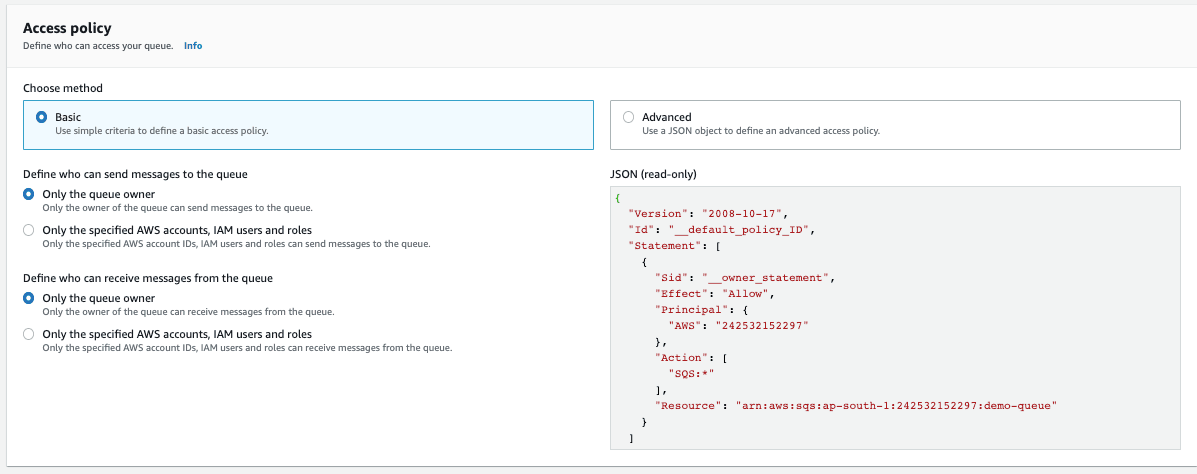
Step 3
Under the Access policy section, we can set who can access this queue and the actions allowed in the queue. You can configure basic and advanced settings for the queue. For the basic settings, You can define who can send messages to the queue and determine who can receive messages to the queue. Here we will select Basic Access Policy and keep only the Queue Owner to send and receive messages from the queue. You can see JSON also on the right side for your reference.
Step 4
Under the Encryption section (Optional), we can set encryption for the messages that are all sent from the queue by enabling the server-side encryption option. But for the demo purpose, we’ll select “Disable” and proceed further.

Step 5
Now you can click “Create queue”. And your SQS Queue is ready to use.
step 6
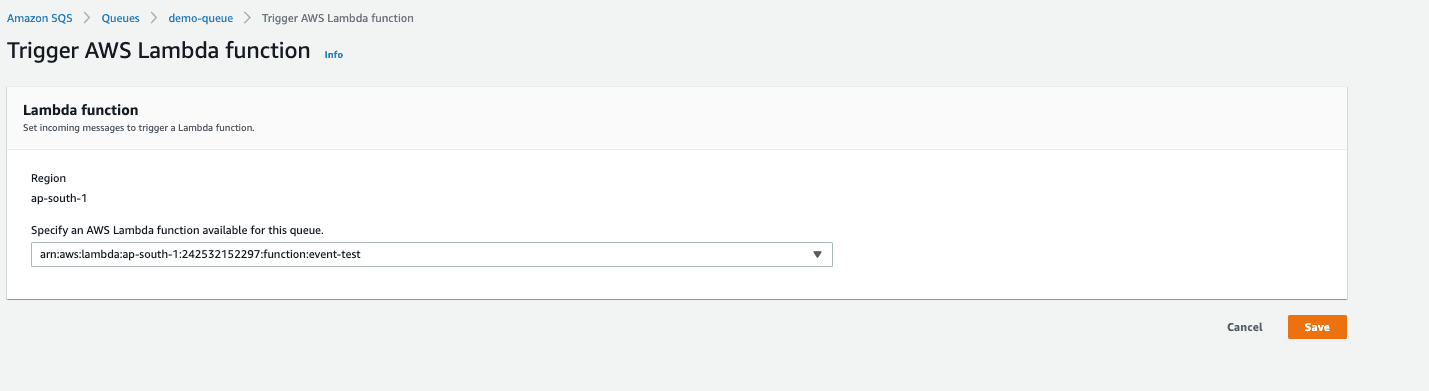
Now you can use your created demo queue by configuring it with the lambda function trigger. Under the Lambda Triggers section, click on the “Configure Lambda function” and select your lambda function from the drop-down list

We have created a sample Lambda function trigger for this SQS queue.
Step 7
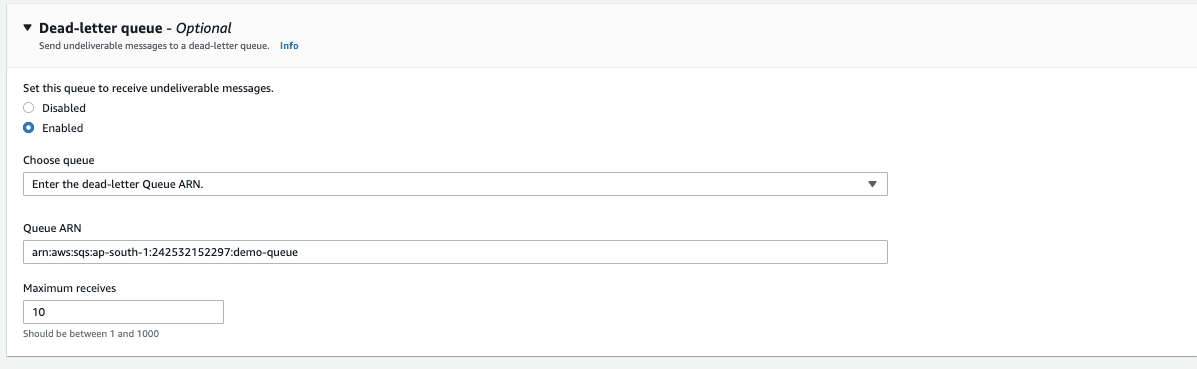
Under the Dead-letter-queue section(Optional), we can set dead-letter queues for our messages in the queue. By default, we’ll select Enable and choose queue ARN from the drop-down and enter the maximum receives to the dead letter queue. But, we can create DeadLetterQueue once we create our queue first. After creating our SQS Queue, Under the Dead-letter-queue section, we can add our DeadLetterQueue and click on the “Save” button.
Pricing
- You Pay for what you use
- No minimum fee
- First 1 Million Requests/Month be free for both standard and FIFO queue
- From 1 Million to 100 Billion Requests/Month $0.40 for standard and $0.50 for FIFO queue.
- From 100 Billion to 200 Billion Requests/Month $0.30 for standard and $0.40 for FIFO queue.
- Over 200 Billion Requests/Month $0.24 for standard and $0.35 for FIFO queue.
Very Minimal pricing and Pay for what you use - simple as that. We’ll cover the rest in the coming parts of this series. Stay tuned.